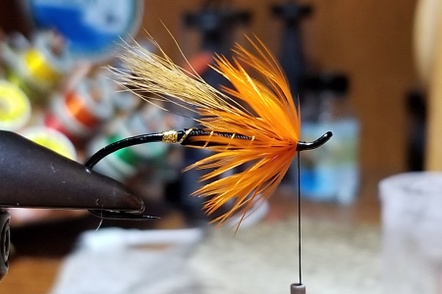
Tying wet fly patterns with a collar can be
daunting for some tyers at first. Up until this point we only had to worry
about a wing wrapped under our heads. While the process of using a collar on a
wet fly has some differences, it is just as easy to do as a collarless wet fly…
I promise.
Some tyers enjoy using neck feathers for
collars. Neck feathers give the fly a thinner looking collar and almost
resembles hairs. Other tyers use hen saddle for the collars on their wet flies.
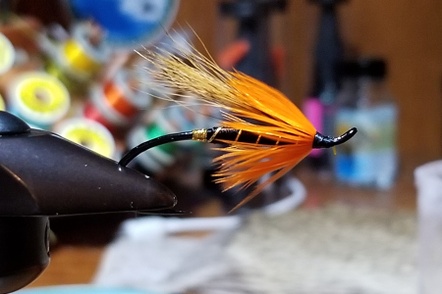
I think the biggest draw to using hen saddle for collars is that the webby
fibers give the collar a fuller look and the color of the saddle tends to look
very deep and rich on the fly. I’m uncertain whether the fish care or not but
who wanted their opinion anyway right?
When prepping a hen saddle feathers for
collars I like to do the following.
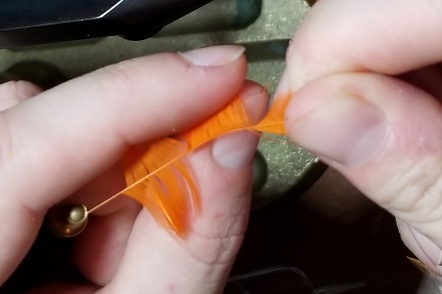
Choosing the Right Size
Everyone uses different size collars on their creations, don’t be afraid to use whatever size you want to. For me personally, I like my collars to extend back to the mid-point between the point of my hook and my eye. So when I choose a feather from a hen saddle I am looking for a feather that has the length of fibers that will give me my desired length of collar. You can judge this by splaying the feather out and holding it up to your hook (Photo 1). You want those fibers to be located in the middle 1/3 of the feather to give yourself lots of material to work with when handling and wrapping the feather.


Prepping Your Feather for Your Collar
You want to get your feather ready for wrapping it. I tie my feather in from the tip end first. I locate the fiber size I am looking for on my feather and if you followed the first step it should be near the middle of your feather. I will strip off the fibers on either side of that portion I am using. That portion may change depending on how many wraps you want to make around your head.
Once I get those extra fibers peeled off, I
hold the feather tip in my right hand between my thumb and index finger and the
base of the feather is clamped in hackle pliers and is held in my left hand (Photo 2).
The hackle pliers should be held in a way that leaves your left index finger and thumb free. While gripping the feather this way and pulling it tight (be careful not to break the feather), you will now take your left index finger and thumb and start combing the fibers back. Be sure to comb them in the direction of the feathers natural palmer (Photo 3).
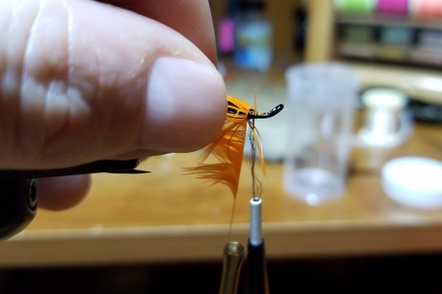
Tying in the Feather
Your feather has been prepped and you have left yourself lots of room to use it, you’re ready to rock! Tie in the tip of your feather just before the fibers start. Sometimes the feather can pull out and if you are having issues with that happening you can coat your thread with tyers wax or even use a small amount of crazy glue to hold it.
As you’re making wraps of your feather you will want to brush the fibers back (Photo 4). I typically make 3 to 4 wraps with hen saddle but you decide what you like…it’s your piece of art.
When you are finished you wraps, tie the feather off and snip your access feather away. You then wrap back onto you collar to secure it and this will also aid in your finished collar to look more cone shaped (Photo 5 and Photo 6).