Just about any fly can catch a fish. It just requires materials that have movement or shine to trick the fish into thinking it is their natural food or a threat that must be attacked. I believe however that a well-constructed fly, one that has taken the mechanics of the fly in mind, can give you better results when they are swimming in the water. I would like to highlight a few of the basic elements that make for a well-balanced feather wing fly.
The amount of hackle, length of tag, how many ribs and thickness of the feather wing can make or break a great presentation to the fish. In this article, I will be sharing the elements of what makes a pleasing body of a feather wing fly specifically for salmon and steelhead.
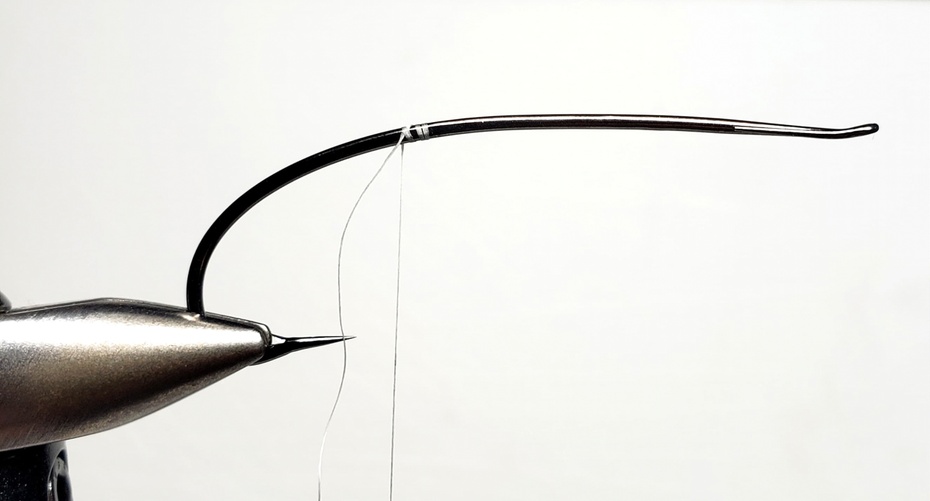
The first important thing to consider is the choice of hook. The most common hooks used in salmon flies are called “low water” hooks. They can have varying degrees of a bend at the back of the shaft but generally, the backbend takes a backseat to the long and straight shaft that provides a platform for a long fly body as well as a low set wing. These low water style hooks can be heavy or light wire hooks and depending on whether you’re wanting a strong hook for big fish that is heavy and sinks fast or a more delicate presentation that is sparse and won’t make a big splash in the water when it is cast. (In the pictures below you can see flies using a low water style hook light and heavy.)
Curved salmon hooks have become more popular with freestyle tyers out there. Instead of having a straight shank, it has a curve in the shaft resulting in a deeper backbend. Blue Heron hooks (Dave McNeese), Bartleet Traditional hooks (Partridge), Alec Jackson Spey hooks (Daiichi) and TG salmon hooks (Veniard); are go-to hooks for freestylers as the structure of the resulted fly has a sleek and sporty look because of a shortened straight shank and longer back curve. The longer back curve of these hooks provides opportunities for a longer tag, lower and longer tail etc. There are many positives to these curved hooks which I will expand on in later articles but for this article, I will share some traits of these hooks at each area of the fly structure as I have tied the featured fly I have broken down in this article on a Blue Heron hook. Below are pictures of flies tied on Blue Herons and Alec Jacksons.
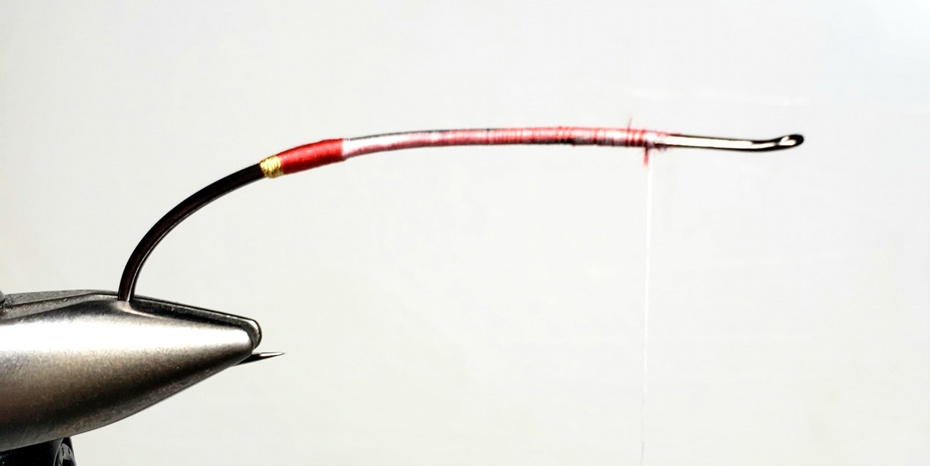
Now that we have the hook let’s explore the elements of tying a well-structured body. As seen in the picture of the first step, I have started my thread approximately 4-5 mm from the point of the hook. You can also measure where to start by starting at the place on the shaft where the shaft starts to bend. I tie in my small oval tinsel here and wrap it back to the point of the hook. I will make four or five wraps with the tinsel then tie it off. In the next picture, you will notice that I did not cut off the excess here but I wrapped the excess back to where I first applied the thread and tied in the tinsel. The reason for this is that if you cut the excess right at the point you tie it off you will create a bump with the cut end. This will cause the next part which is the tag to have that bump instead of being a smooth and uniformed surface.
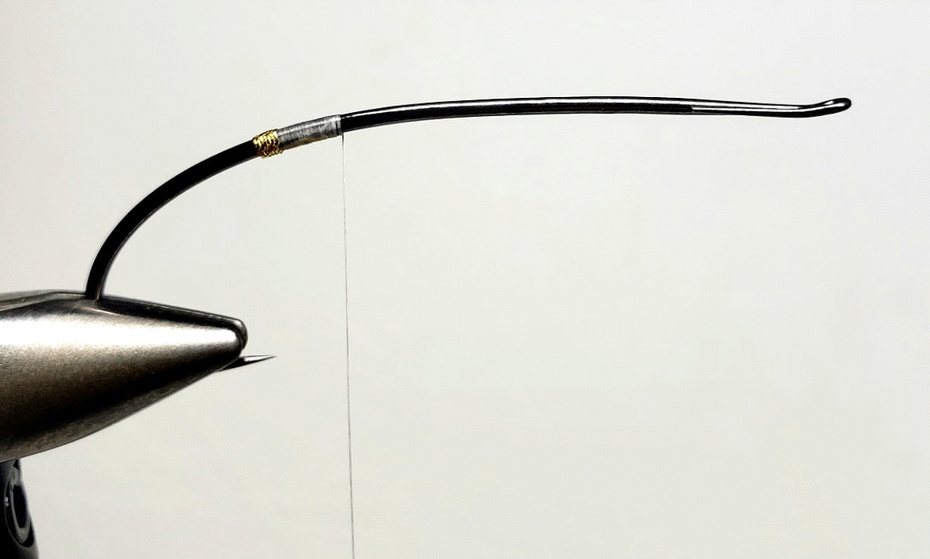
Next, I will go forward a wrap or two and tie in my silk floss. Depending on the floss you are using you may want to either split the floss and only use half the amount or wrap over the floss back to where your tip ended and do just one layer of wraps for the tip. Wrap one or two layers of floss and end where you tied it in. If the floss seems thick or creates segmentation or bumps then twist the floss to open up the fibres and make it flatter instead of a cord. Once done tie off the floss with a few wraps then wrap over the ends forward to the return of the hook eye. This will fill in the space or bump created by the hook eye return. It will also start to create a cigar-shaped taper you are seeking when having a floss or tinsel-bodied fly. For brevity, I chose a dubbing body to cut down on a few steps. But even with a dubbed body, it is important on these curved hooks to have a cigar-shaped taper to the body.
Next, as you can see in the next pics I have tied in an ostrich herl butt. When tying the herl in, make sure you have enough bare stem to tie in and also to do half a wrap without herl. Also as you tie in the herl be sure to have the stem side facing down. This way when you start to wrap you will see the stem in front and the herl pointing towards the back of the hook. Wrap four or five turns of the herl or enough to be approximately 3 mm long and tie off. You can then wrap the excess back to the eye return.
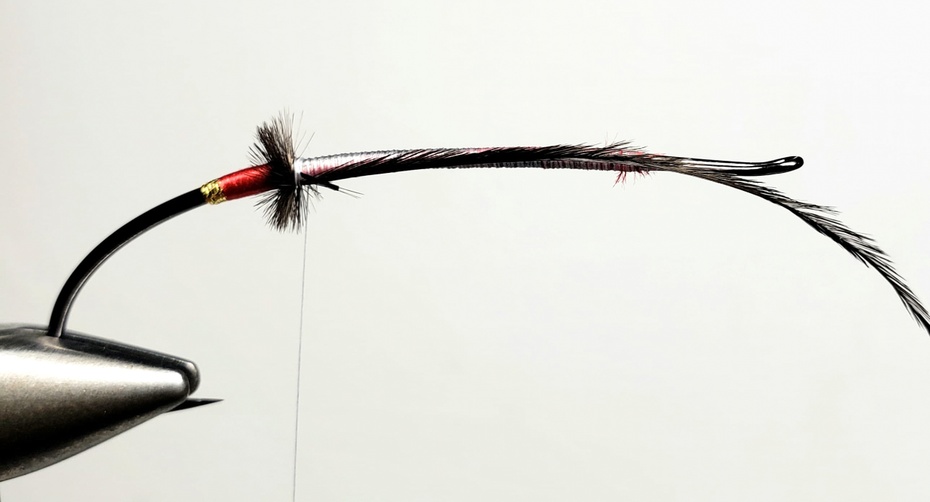

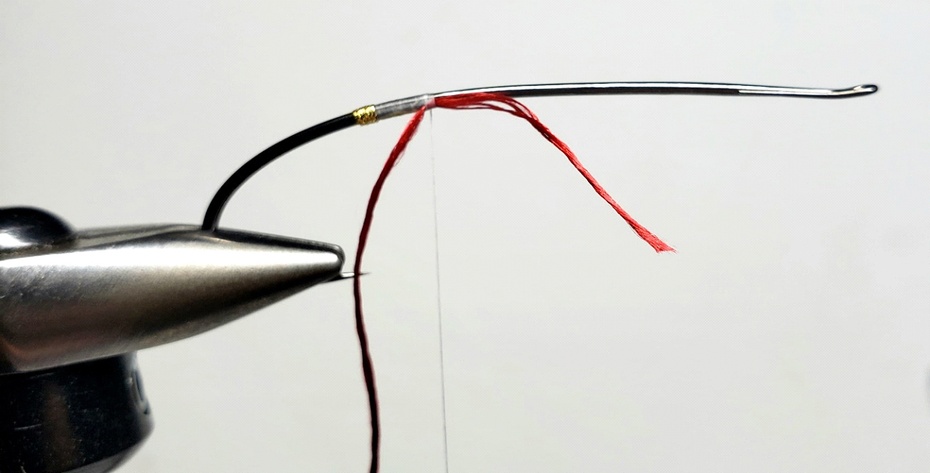
For the next step, you will tie in your body tinsels at the eye, return and wrap it back underneath the hook all the way back up against the ending of the herl butt. Here, you can tie your hackle in butt end first. It is important to note the preparation of the hackle here. If you are using a sparse hackle such as cock hackle or heron you can use the whole feather. If you are using a webbier feather such as schlappen or magnum-sized hen or the like you will have better movement of the swim if you strip the barbs off the one side of the feather before you tie it in. Tie in the hackle and take a few wraps forward with the excess then cut off the remaining excess.
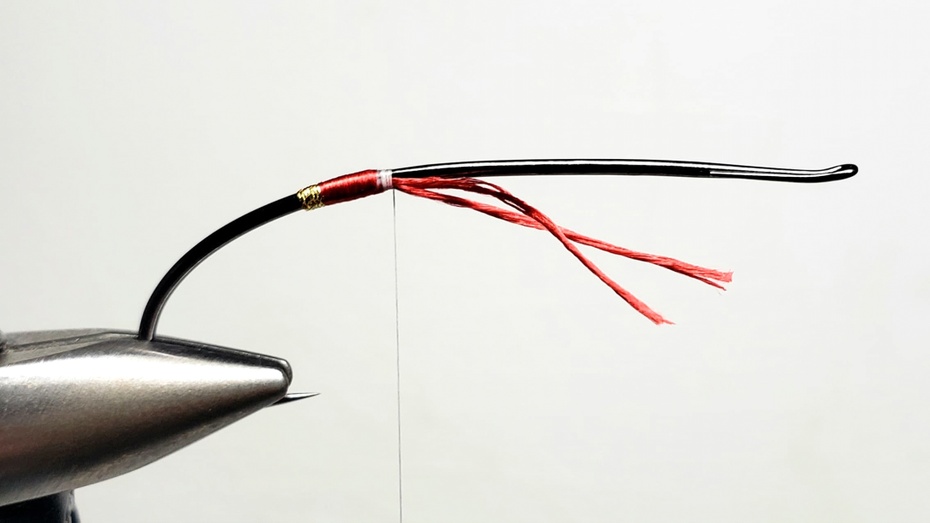
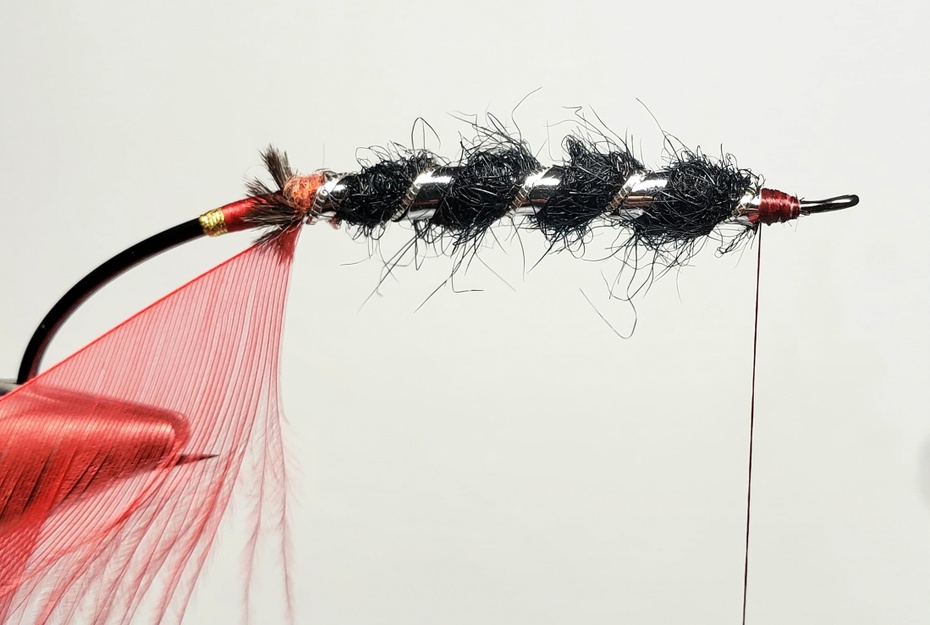
Now you can start wrapping a dubbing body. As it is important to have a nice cigar-shaped body, make sure the dubbing noodle start small and tight so you can start a uniformed taper. Once you have wrapped your dubbing body you will next wrap up your tinsels. The first one to wrap is the medium flat tinsel. Make five evenly spaced wraps up to the end of the dubbing body and tie off. Leave the excess for now. Next, wrap up the medium oval tinsel so it touches the backside of the flat tinsel all the way up to the end of the body. Tie off with four or five wraps and leave the excess for now. Next, you can take a Velcro brush or dubbing pick and pick out some fibres in the dubbing body to make it look a little buggy. Less is more so don’t go crazy with picking out the dubbing as it will restrict the movement of the body hackle.
Once you are satisfied with the dubbing body you can hold the tinsel excesses in place, pinching them with your fingers so they don’t move and undo the wraps for both until they are no longer tied in. Then tie four wraps over both at the same time and cut off the excess. This will save bulk if you use this technique.
The next step of course is wrapping the body hackle up to the front. If it is a feather with one side stripped then as you wrap you will ensure that the stem is right up against the back of the oval tinsel. The tinsel will protect the stem from fish teeth longer. As you wrap the hackle you can twist the stem slightly so the barbs sweep backwards at a 45-degree angle. Tie off at the end of the body. And wrap over excess 2-3 wraps and bend stem back and wrap back to where you started. This locks in the feather end for security. Next, you will tie in the collar feather. This can be guinea, teal, grizzly hackle or anything different than the body hackle. This provides contrast for the fish. Tie it in by the tip and cut off the excess. Take three or four wraps of it and tie it off to secure the excess just as you did with the body hackle.
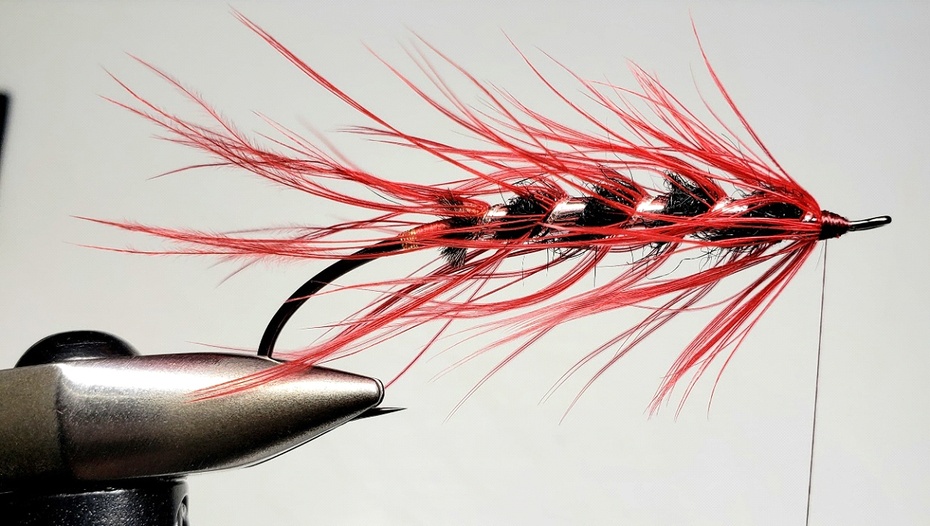
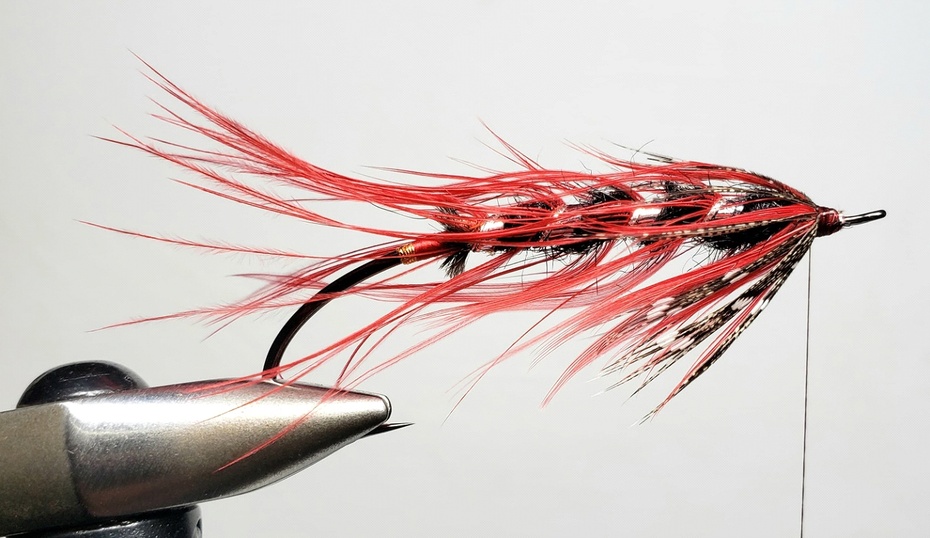
Now that all the hackle is secure you can use a toothbrush or the like to stroke the hackle in a backwards sweep[ you can also squeeze the hackle in between your fingers and pull it down and back to help with the backwards-looking sweep. You can see the desired result in the picture. You want most of the hackle below the top of the hook so you have a flat platform to lay your wing on. So now you have done a balanced body and are ready for the wing. Next time, I will get into setting a great feather wing that crowns it all.

